A water softener removes minerals from water, making a home’s water kinder to bodies, hair, appliances, pipes, and more. Hard water—that is, water with lots of minerals— is more than a nuisance.
It can stain sinks, reduce the cleaning power of detergent, cause buildup in faucets and pipes, and shorten the life of a water heater. The right water softener Choice is a valuable addition for you.
For more about water softeners and how they work, see How Water Softeners Work. If you’re starting from scratch with a new home water system, or if you’re simply adding a water softener to an existing system, the installation process is relatively straightforward.
We’ll tell you how to install a water softener in a safe and easy way and share some of the common mistakes people make when attempting this for the first time.
Things To Know Before Installing A Water Softener
Check for a water softener sizing calculator online, which will give you an estimate of how much resin your system will need to remove the calcium and magnesium from your water.
Be sure there is enough room to install the unit. Water softeners can be as small as a briefcase or as large as a washing machine. Some models must be installed upright, while others can be installed on their side.
If you have a public water supply, check with your local water company to see if a water softener is allowed. Some companies have regulations against using them.
If you have a septic tank, check with your local health department to see if a water softener is allowed. Some septic systems are not designed to handle the increased amount of water a softener will put into the system.
A Brief Note About Water Loops
A water loop keeps softened water inside your home, directing it towards faucets and appliances like your water heater. It prevents the softened water from making it outside to your garden hose. This is important for a number of reasons, one of which is conserving water.
Some homes come with a pre-installed water loop. This is ideal if you’re installing a water softener for the first time, as it means you won’t have to install one.
If your home doesn’t have a water loop, don’t worry. They’re not difficult to install and most hardware stores will sell the materials you need.
If your home doesn’t have a pre-installed loop, you’ll have to install new pipes that divert water from the mainline when it enters your house. You’ll connect the water softener to this separate line. We’ll provide more instructions for this in an upcoming section.
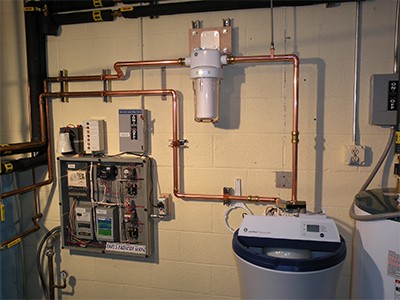
If your home has a water softener loop, you’ll likely find it in the garage. It comes out of the wall, forming a “U” shape before re-entering the wall a few inches further.
How To Install A Water Softener?
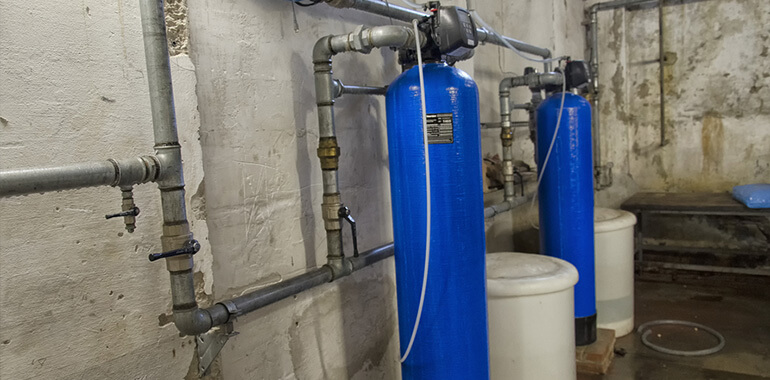
If Your Home Has A Loop
After you’ve chosen the correct size water softener for your home, gather the following tools:
- soldering iron kit
- a wrench
- measuring tape
- flexible tubing
- pipe cutters
- Teflon tape
- flux
- an elbow fitting
- copper pipe
- any fittings/adapters that came with your water softener
You can find all of these items at your local home hardware store.
Once you’ve got everything you need, here are the steps you need to take.
Shut your water off.
Locate your home’s main water shut-off valve and activate it. If you live in Arizona, this valve is most likely outside your home, near your water meter. Alternatively, you may find it in a utility closet or your garage.
As an added precaution, open one or more of your faucets and let any existing water in your pipes drain out.
Turn Your Water Heater’s Electricity off (if applicable)
If you have an electric water heater, disconnect its power supply by shutting off the appropriate breaker.
Figure out Where to Install Your Water Softener
You have a few different options. The most common choice is to place the softener as close as possible to the point at which water enters your home. Placing it this early in the chain will protect all of your home’s fixtures and appliances from mineral damage.
This is typically where your water loop will be as well.
Using your pipe cutter, remove the connecting part of your water loop.
You’ll be left with two pipes sticking out of the wall. One of these pipes will funnel untreated water into your softener while the other will funnel treated water out of it and to your appliances.
Attach an elbow fitting to one end of your now-separated main water line.
You’ll want this elbow fitting to face in whatever direction your water softener’s inflow and outflow valves are. So if the water loop is high up on the wall, the elbow will face downward — and vice versa.
- Use your measuring tape to determine how much pipe is needed to bridge the gap between your elbow fitting and your water softener’s valves.
- Cut the pipe to the appropriate length.
- Prior to attaching the pipe, solder any fittings that are needed to connect the pipe to the bypass valve.
- Connect the pipe.
Your water softener likely came with brass fittings/adaptors. Use those to connect the pipe properly.
Configure your water softener’s drain hose and brine tank.
Most people use a clamp right at the onset of the water softener’s drain hose. This prevents water from flowing back into the unit. The other end of the drain hose can lead into a utility sink or floor drain.
For instructions on how to set up your brine tank, refer to the owner’s manual. Typically, you’ll just need to connect the brine tank to your main water softener unit with piping and then fill it up with salt.
Connect Your Water Softener’s overflow Tube to its Brine Tank
Your water softener’s manual should provide detailed instructions on how to configure this. Look to that documentation for information about the proper height and placement of this overflow tube.
Switch the bypass valve to the ‘active’ position and reactivate your home’s water supply.
This should flush most of the sediment buildup out of your plumbing.
What’s Next?
Once you’ve completed these steps, you should be able to activate your water softener and set it to ‘backwash.’ Deactivate your bypass valve and refer to your owner’s manual for the next steps how much salt to add, etc).
If Your Home Doesn’t Have A Loop
If your home doesn’t have a water loop, you’ll need to install one. As mentioned earlier, a loop is essential for your water softener connections if you want to conserve water.
Conclusion:
Overall, setting up a water softener system is a relatively easy process. By following the steps outlined above, you can ensure that your home’s plumbing is protected from mineral build-up and scale. Doing so will also extend the life of your fixtures, appliances, and pipes.
Frequently Asked Questions
What should the water softener be set at?
The ideal setting for a water softener is dependent on a few factors, including the hardness of your water and the size of your unit. For more specific guidance, refer to your owner’s manual or consult a professional.
What is a good number for water hardness?
hardness is generally measured in grains per gallon (GPG). The U.S. Geological Survey notes that water with a hardness of 3.5–7 GPG is considered “moderately hard,” while water with a hardness greater than 7 GPG is considered “hard.”
How often should I add salt to my water softener?
The frequency with which you need to add salt to your water softener will depend on how much you use it. As a general rule of thumb, you should add salt to your unit every two to four weeks. For more specific guidance, refer to your owner’s manual.
What are the disadvantages of soft water?
There are a few potential disadvantages of soft water, including:
- Soap can feel slimy when used in hard water
- Might need to use more soap to achieve desired results
- Water might not taste as “fresh” as you’re used to
- Pipes and fixtures might require more maintenance
- Might need to use a water softener cleaner to remove mineral buildup from your unit
Despite these potential drawbacks, the advantages of soft water typically outweigh the disadvantages. This is why many homeowners choose to install a water softener system in their homes.
How much does it cost to install a water softener?
The cost of installing a water softener will vary depending on a number of factors, including the type and size of unit you choose. On average, you can expect to spend between $200 and $700 on installation costs. For more specific pricing information, consult a professional.
Do I need a water softener if I have a water purifier?
No, you don’t need a water softener if you have a water purifier. However, you might want to consider installing a water softener in addition to your purifier if you live in an area with hard water. This will help to extend the life of your plumbing and prevent mineral buildup in your pipes.
Please note: CharlieTrotters.com is reader supported. This page may contain affiliate links. If you buy a product or service through such a link we earn a commission at no additional cost to you.

![10 Best Water Softener Resin [2022] | Top Picks Reviewed Best Water Softener Resin [2020]](https://www.charlietrotters.com/wp-content/uploads/2020/09/best-water-softener-resin.jpg)
![10 Best Water Softeners Reviews [2022] – Top Picks & Buyer’s Guide best-water-softeners](https://www.charlietrotters.com/wp-content/uploads/2019/09/best-water-softeners.jpg)
![Best Good Housekeeping Water Softener Reviews [Top 3 in 2022] Best Good Housekeeping Water Softener Reviews](https://www.charlietrotters.com/wp-content/uploads/2022/02/Purple-Orange-Gadget-Review-2022-Youtube-Thumbnail-1-770x515.png)
